
ryobi table saw manual
This manual provides essential information for safe and effective operation of the Ryobi table saw‚ covering setup‚ maintenance‚ troubleshooting‚ and warranty details for optimal performance․
1․1 Overview of the Ryobi Table Saw
The Ryobi table saw is a versatile power tool designed for precise cutting of various materials‚ including wood and plastic․ It features a durable construction‚ a powerful motor‚ and adjustable settings for different cutting needs․ The saw includes a sturdy table‚ a reliable blade system‚ and safety features to ensure safe operation․ Its compact design makes it ideal for both professional and home workshops․ The tool is engineered to deliver consistent performance for crosscutting‚ rip cutting‚ and angled cuts‚ catering to a wide range of woodworking tasks․
1․2 Importance of Reading the Manual
Reading the Ryobi table saw manual is crucial for understanding proper operation‚ safety guidelines‚ and maintenance tips․ It ensures users are aware of potential hazards and learn how to handle the tool safely․ The manual provides detailed instructions for assembly‚ usage‚ and troubleshooting‚ helping to prevent errors and extend the tool’s lifespan․ By following the guidelines‚ users can achieve optimal performance and ensure their safety while working with the saw․ It is essential to review the manual thoroughly before initial use to familiarize yourself with all features and operations․
Safety Precautions and Guidelines
Adhering to safety guidelines is essential to prevent accidents․ Always follow proper handling practices and ensure the saw is used in a controlled‚ secure environment․
2․1 General Safety Rules for Table Saw Operation
Always wear protective gear‚ including safety glasses and hearing protection․ Ensure the work area is clean and well-lit to avoid hazards․ Keep loose clothing tied back and avoid jewelry that could catch․ Never operate the saw with wet hands or while fatigued․ Use push sticks or other safety devices for precise control․ Maintain a firm grip on materials and keep your body positioned to avoid kickback․ Ensure the blade guard is in place and functional unless necessary for specific cuts․ Follow all manufacturer guidelines for optimal safety․
2․2 Specific Safety Features of the Ryobi Table Saw
The Ryobi table saw includes a blade guard to protect against direct contact with the saw blade and anti-kickback pawls to prevent material from being thrown back․ An emergency stop mechanism allows for quick shutdown in case of an emergency․ The riving knife helps reduce kickback by maintaining material contact‚ while the adjustable fence ensures accurate cuts․ Always ensure these features are properly installed and maintained for optimal safety and performance․ Adhere to all manufacturer guidelines for safe operation․

Understanding the Ryobi Table Saw Components
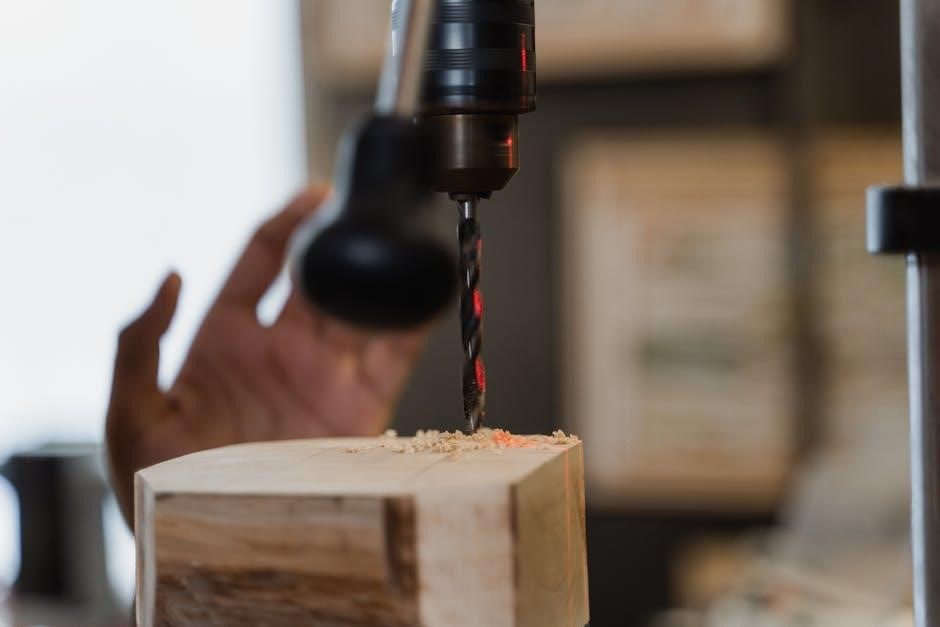
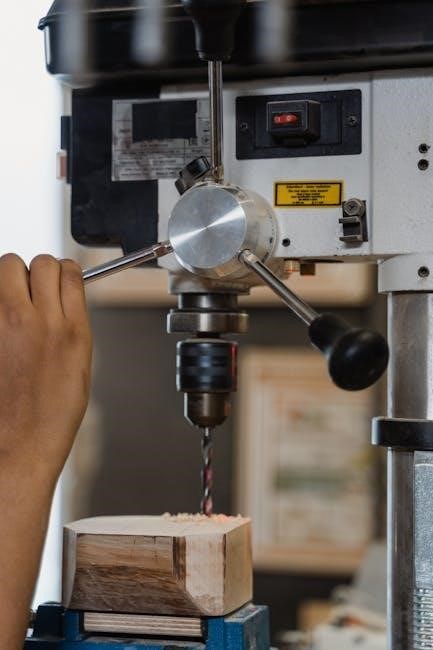
The Ryobi table saw features a durable design with key components like the saw blade‚ arbor‚ motor‚ fence‚ and miter gauge‚ each serving specific functions for precise cutting operations․
3․1 Key Parts and Accessories of the Table Saw
The Ryobi table saw includes essential components like the saw blade‚ arbor‚ and motor‚ which drive cutting operations․ Additional accessories such as the fence‚ miter gauge‚ and riving knife enhance precision and safety․ The push rod aids in safely guiding materials through the blade․ These parts are designed to work together seamlessly‚ ensuring accurate cuts and efficient workflow․ Proper understanding and maintenance of these components are crucial for optimal performance and longevity of the tool․
3․2 Functions of the Saw Blade‚ Arbor‚ and Motor
The saw blade is responsible for making precise cuts in various materials‚ while the arbor securely holds the blade in place․ The motor powers the arbor‚ ensuring smooth and consistent operation․ Together‚ these components work to deliver accurate and efficient cutting performance․ Regular maintenance‚ such as sharpening the blade and ensuring proper arbor alignment‚ is essential for maintaining optimal functionality and extending the lifespan of the table saw․
Assembly and Initial Setup
Unpack and inventory all parts‚ then follow step-by-step assembly instructions carefully․ Ensure proper alignment and secure tightening of components․ Store the saw in a dry‚ protected area․
4․1 Unpacking and Inventory of Parts
Begin by carefully unpacking the Ryobi table saw and its accessories․ Check all components against the manual to ensure no parts are missing or damaged․ Key items include the table saw‚ stand‚ fence‚ miter gauge‚ and blade․ Store the saw in a dry‚ protected area to prevent damage․ Handle all parts with care to avoid injury․ Once unpacked‚ organize the components for easy access during assembly․ This step ensures a smooth setup process and helps verify that everything is accounted for before proceeding․
4․2 Step-by-Step Assembly Instructions
Start by attaching the stand to the table saw base using the provided bolts․ Ensure the stand is level and secure․ Next‚ install the fence and miter gauge‚ aligning them with the table surface․ Attach the blade guard and anti-kickback pawls according to the manual․ Finally‚ mount the saw blade‚ tighten the arbor nut‚ and ensure all components are properly secured․ Double-check all connections and alignments before powering on the saw for the first time․ Refer to the manual for specific torque values and safety checks․
Operating the Ryobi Table Saw
Always follow safety practices‚ align the fence‚ and secure materials before cutting․ Use push sticks for small workpieces and adjust blade angle for bevel cuts․ Maintain control throughout operation;
5․1 Basic Operations: Crosscutting and Rip Cutting
Crosscutting involves cutting wood across the grain for precise lengths‚ while rip cutting is done along the grain for width adjustments․ Always align the fence correctly for accuracy and use a push stick for smaller workpieces․ Ensure the saw blade is sharp and properly seated․ Maintain steady control during operation and avoid distractions․ Keep loose clothing tied back and never reach over the blade․ Follow safety guidelines for a smooth and safe cutting experience with your Ryobi table saw․
5․2 Advanced Techniques: Bevel and Compound Cuts
Bevel cuts are made by tilting the saw blade at an angle‚ ideal for creating angled joints or decorative edges․ Compound cuts combine a bevel and miter angle for complex designs․ Always adjust the blade angle using the handwheel and ensure the fence is aligned properly․ Use a combination square to verify accuracy․ Start with small test cuts to ensure the angle is correct․ For compound cuts‚ set the miter angle first‚ then tilt the blade for precise results․ Safety and patience are key to mastering these techniques with your Ryobi table saw․

Maintenance and Care
Regular maintenance ensures optimal performance and longevity of your Ryobi table saw․ Clean the table and blade regularly‚ lubricate moving parts‚ and store the saw properly in a dry environment․

6․1 Cleaning and Lubricating the Table Saw
To maintain your Ryobi table saw‚ regularly clean the table surface and blade from dust and debris using a soft brush or cloth․ Lubricate the arbor and moving parts with a silicone-based spray to ensure smooth operation․ Avoid using excessive lubricant to prevent attracting dust․ Inspect the saw for wear and tear‚ and tighten any loose bolts or screws․ Store the saw in a dry‚ cool place to protect it from rust and corrosion․ Proper maintenance ensures optimal performance and longevity․
6․2 Replacing and Sharpening the Saw Blade
To replace the saw blade‚ first tilt it to 45 degrees and remove the arbor nut using the provided wrench․ Inspect the blade for damage and sharpen or replace it as needed․ Use a diamond stone or professional sharpening service for maintaining blade efficiency․ After sharpening‚ ensure the blade is properly aligned and securely tightened․ Always follow safety guidelines when handling the blade to avoid injuries․ Regular sharpening and proper blade care are crucial for precise cuts and extended tool lifespan․

Troubleshooting Common Issues

Identify and resolve common problems like blade misalignment or motor issues by following diagnostic steps in this section for optimal performance and safety of your Ryobi table saw․
7․1 Diagnosing and Fixing Blade Alignment Problems
Blade alignment issues can cause uneven cuts and safety hazards․ Check if the blade is parallel to the table and fence․ If misaligned‚ tighten the arbor nut securely․ Loosen the adjustment screws on the saw table to realign the blade․ Use a wrench to adjust the arbor flange and ensure proper seating․ Refer to the manual for precise alignment steps․ Always verify alignment after blade replacement or adjustments to maintain accuracy and safety during operations․
7․2 Resolving Motor and Power Issues

Motor issues can disrupt your workflow․ If the saw doesn’t start‚ check the power cord and ensure it’s properly plugged in․ Verify the circuit breaker hasn’t tripped․ If the motor overheats‚ allow it to cool before restarting․ For reduced power‚ inspect for dust buildup or worn brushes․ Consult the manual for brush replacement instructions․ Always unplug the saw before performing diagnostics to ensure safety․ Addressing these issues promptly helps maintain optimal performance and extends the motor’s lifespan․
Warranty and Support Information
Ryobi offers a two-year limited warranty for its table saws‚ covering defects in materials and workmanship․ For support‚ visit authorized service centers or contact customer support directly․
8․1 Understanding the Ryobi Warranty Policy
Ryobi offers a limited two-year warranty for its table saws‚ covering defects in materials and workmanship․ The warranty applies to original purchasers and is non-transferable․ To file a claim‚ contact Ryobi customer support or visit an authorized service center with proof of purchase․ The warranty does not cover damage from misuse‚ normal wear‚ or improper maintenance․ Regular maintenance‚ as outlined in the manual‚ is essential to ensure warranty validity and optimal performance of your Ryobi table saw․
8․2 Contacting Customer Support and Service Centers
For inquiries or service‚ contact Ryobi customer support via phone or email through their official website․ Visit authorized service centers for professional assistance․ Provide your tool’s model number and proof of purchase for efficient support․ Customer support is available to address warranty claims‚ repair requests‚ and technical questions‚ ensuring your Ryobi table saw operates at its best․
Following the manual ensures safe and efficient use of your Ryobi table saw․ Regular maintenance and adherence to guidelines maximize performance and longevity of the tool․
9․1 Best Practices for Long-Term Use
Regularly clean and lubricate moving parts to maintain optimal performance․ Store the saw in a dry‚ secure location to prevent rust and damage․ Always use a dust collection system to reduce debris buildup․ Check blade alignment periodically and ensure sharpness for precise cuts․ Follow all safety guidelines to avoid accidents and prolong tool life․ Keep the work area well-lit and clear of clutter for better control․ Store the saw indoors and use a cover to protect it from dust and moisture․ Proper maintenance ensures years of reliable service and consistent results․
9․2 Staying Updated with Manufacturer Guidelines

Regularly visit the Ryobi website for updates‚ new safety guidelines‚ and technical support․ Subscribe to newsletters for product announcements and maintenance tips․ Check for firmware updates if applicable and follow instructions carefully․ Review updated manuals or user guides for new features or safety protocols․ Engage with customer support for any queries or concerns․ Staying informed ensures compliance with safety standards and optimal tool performance․ Manufacturer updates often include improvements for reliability and functionality‚ so it’s crucial to stay connected for the latest information and resources․
Leave a Reply
You must be logged in to post a comment.