honeywell pro 4000 installation guide
The Honeywell Pro 4000 is a 5-2 day programmable thermostat designed for easy installation and energy efficiency‚ offering a user-friendly interface and Honeywell’s reliable performance.
1.1 Overview of the Honeywell Pro 4000 Thermostat
The Honeywell Pro 4000 is a 5-2 day programmable digital thermostat designed for simplicity and efficiency. It offers a backlit display for easy readability and a user-friendly interface. With pre-set energy-saving programs‚ it helps reduce heating and cooling costs. The thermostat is compatible with various HVAC systems and features a slide-to-set temperature control. Its compact design and reliable performance make it a popular choice for homeowners seeking a straightforward temperature management solution. It is backed by Honeywell’s trusted reputation for quality and innovation in home comfort systems.
1.2 Key Features and Benefits
The Honeywell Pro 4000 boasts a range of features that enhance comfort and efficiency. Its 5-2 day programmable design allows for tailored temperature settings‚ optimizing energy use. The backlit digital display ensures easy readability‚ while the slide-to-set temperature control simplifies operation. It offers pre-set energy-saving programs to reduce costs and is compatible with most HVAC systems. The thermostat also includes a 5-year warranty‚ reflecting Honeywell’s commitment to quality. These features make it an ideal choice for homeowners seeking a reliable‚ user-friendly solution for temperature control.
Pre-Installation Requirements
Before installing the Honeywell Pro 4000‚ ensure your HVAC system is compatible and gather necessary tools. Verify power requirements and shut off the system to begin safely.

2.1 System Compatibility Check
Verify that the Honeywell Pro 4000 is compatible with your HVAC system. Ensure the thermostat supports your system type‚ such as forced air‚ heat pump‚ or radiant heating. Check voltage requirements and wiring configuration to match your system. Confirm that the thermostat’s programmable features align with your heating and cooling needs. If unsure‚ consult the user manual or contact Honeywell support for assistance. Proper compatibility ensures seamless installation and optimal performance.
2.2 Tools and Materials Needed

For a successful installation‚ gather the necessary tools and materials. You will need a flathead screwdriver‚ needle-nose pliers‚ a voltage tester‚ and a level to ensure proper mounting. Additionally‚ have wire strippers and a drill (if wall anchors are required). Ensure you have the mounting hardware provided with the thermostat‚ as well as extra screws or wall anchors if needed. Verify the compatibility of your existing wiring with the Honeywell Pro 4000 before proceeding.

Installation Steps
The Honeywell Pro 4000 installation is a streamlined process requiring basic tools and attention to safety. Follow the steps to ensure optimal performance and comfort.
3.1 Shutting Off Power to the HVAC System
Before starting the installation‚ ensure the HVAC system is powered off for safety. Locate the circuit breaker or fuse box controlling the system and switch it off. Verify the thermostat screen is dark to confirm power is off. This step prevents electrical shocks or damage during installation. Always prioritize safety when working with electrical systems. Proper shutdown ensures a smooth and hazard-free installation process for your Honeywell Pro 4000 thermostat.
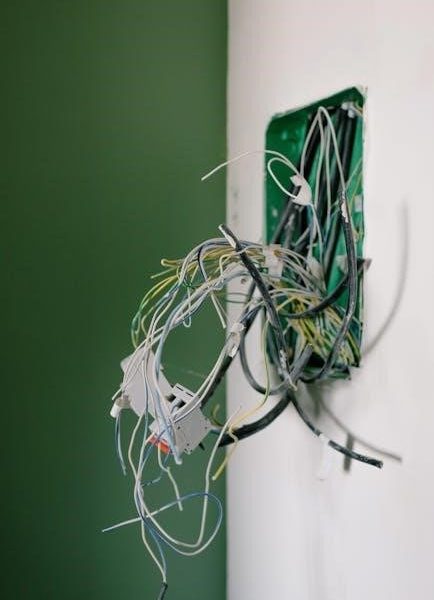
3.2 Removing the Old Thermostat
Start by carefully disconnecting the old thermostat from the wall. Gently pull it forward to access the wires behind. Do not pull by the wires‚ as this could damage the system. Once the thermostat is removed‚ label each wire with its corresponding terminal (e.g.‚ R‚ W‚ Y‚ G‚ C) using the provided stickers. This ensures proper reconnection later. Store the wires securely to prevent them from falling back into the wall. This step is crucial for a smooth installation of the Honeywell Pro 4000.
3.3 Mounting the Honeywell Pro 4000
Once the old thermostat is removed‚ align the mounting plate with the wall and screw it into place using the provided screws. Ensure the plate is level for proper installation. Gently attach the wires to the corresponding terminals on the mounting plate‚ matching the labels from the old thermostat. Finally‚ snap the Honeywell Pro 4000 thermostat into the mounting plate until it clicks securely. This step ensures a stable and professional-looking installation.
Configuring the Thermostat
Configure the thermostat by setting the time‚ date‚ and selecting the operating mode (Heat/Cool). Use the pre-set energy-saving program or customize settings for optimal efficiency and comfort.
4.1 Setting the Time and Date
Accurately setting the time and date on your Honeywell Pro 4000 is essential for proper thermostat operation. Press the “Set” button to access the time and date menu. Use the up and down arrows to adjust the current time and select the correct day. Save your settings to ensure the thermostat operates according to your schedule. This step is crucial for enabling the pre-set energy-saving programs and custom schedules. Make sure the system switch is set to “Heat” or “Cool” based on your HVAC setup.
4.2 Selecting the Operating Mode (Heat/Cool)
Selecting the correct operating mode ensures your HVAC system functions properly. Locate the “SYSTEM” switch on the Honeywell Pro 4000‚ typically found on the thermostat or in the menu. Set it to “Heat” for heating or “Cool” for cooling. This setting determines how the thermostat regulates your home’s temperature. Proper selection is essential for optimal performance and energy efficiency. Always verify the mode matches your HVAC system’s current operation to avoid issues with heating or cooling.

Programming the Thermostat

The Honeywell Pro 4000 allows easy programming with pre-set energy-saving schedules. Customize your temperature settings for weekdays and weekends to optimize comfort and energy efficiency.
5.1 Understanding the Pre-Set Energy-Saving Program
The Honeywell Pro 4000 comes with a pre-set energy-saving program designed to reduce heating and cooling costs. This program follows a schedule that aligns with typical household routines‚ adjusting temperatures during periods when energy demand is lower. For example‚ it may lower the temperature when the house is unoccupied or at night. These settings are optimized for energy efficiency but can be customized to fit your specific needs. The thermostat’s default program is easy to follow and provides a great starting point for maximizing savings without sacrificing comfort.
5.2 Customizing the Schedule for Weekdays and Weekends
The Honeywell Pro 4000 allows you to tailor your temperature settings to match your lifestyle. You can program up to four time periods daily‚ with distinct settings for weekdays and weekends. This flexibility ensures optimal comfort and energy savings. For example‚ you can set the thermostat to lower the temperature when you’re away during the day or raise it when you’re home. Use the “Menu” button to navigate to the scheduling section‚ then press “NEXT” or “PREV” to select time periods and adjust temperatures. After setting your preferences‚ save the changes to maintain your customized schedule.

Advanced Features
The Honeywell Pro 4000 offers advanced features like Wi-Fi connectivity‚ remote control via the Honeywell Home app‚ and energy-saving programs to enhance convenience and efficiency.

6.1 Enabling Wi-Fi Connectivity
To enable Wi-Fi connectivity on the Honeywell Pro 4000‚ ensure the thermostat is connected to your home network. Open the Honeywell Home app‚ select your thermostat‚ and follow the in-app prompts to complete the connection. Once connected‚ you can control the thermostat remotely‚ receive updates‚ and access advanced features. Ensure your router is functioning properly and the thermostat is updated to the latest firmware for optimal performance. This feature enhances convenience and energy management capabilities.
6.2 Using the Honeywell Home App for Remote Control
The Honeywell Home app allows seamless remote control of your Pro 4000 thermostat. Download and install the app on your smartphone or tablet‚ then link it to your thermostat via Wi-Fi. This enables you to adjust temperatures‚ monitor energy usage‚ and receive notifications from anywhere. The app’s intuitive interface simplifies scheduling and ensures your home remains comfortable while optimizing energy efficiency.
With the Honeywell Home app‚ you can program custom temperature settings‚ override schedules‚ and access real-time data. This feature enhances convenience and provides peace of mind‚ knowing you can manage your HVAC system remotely. Regular app updates ensure improved functionality and security for your smart home experience.

Troubleshooting Common Issues
Common issues with the Honeywell Pro 4000 include display malfunctions‚ temperature inaccuracies‚ or unresponsiveness. Check power supply‚ reset the thermostat‚ or replace batteries if necessary.
7.1 Resolving Connectivity Problems
If the Honeywell Pro 4000 experiences connectivity issues‚ ensure the Wi-Fi is enabled and the thermostat is connected to your home network. Restart your router‚ check for firmware updates‚ and verify network settings. If problems persist‚ reset the thermostat by removing the batteries for 10 seconds. Use the Honeywell Home app to troubleshoot connection status. Ensure the thermostat is linked to your account and that the internet connection is stable. These steps should restore connectivity and resolve common Wi-Fi issues effectively.
7.2 Replacing Batteries and Maintaining the Thermostat
To ensure optimal performance‚ replace the Honeywell Pro 4000’s batteries annually or when the low-battery indicator appears. Remove the thermostat from the wall plate‚ locate the battery compartment on the back‚ and replace the AA alkaline batteries. After replacing‚ reattach the thermostat and test its functionality. Regularly clean the display and sensors with a soft cloth to maintain accuracy. Additionally‚ check and replace air filters in your HVAC system to ensure proper airflow and efficient operation.
The Honeywell Pro 4000 installation is complete. Verify all settings for proper function and optimal energy efficiency‚ ensuring a comfortable and energy-saving experience for years to come.
8.1 Verifying Proper Installation
After installation‚ ensure all connections are secure and correctly wired. Turn on the power and verify the display lights up‚ showing the correct time and settings. Test the thermostat by adjusting the temperature to confirm the HVAC system responds. Check for any error messages and ensure the system switch is set to the correct mode (Heat/Cool). If everything functions properly‚ your Honeywell Pro 4000 is installed correctly. Consult the user manual or contact support if issues persist.
8.2 Ensuring Optimal Performance
For optimal performance‚ ensure the Honeywell Pro 4000 is properly programmed with energy-saving settings. Regularly check and update the time and date to maintain schedules. Verify the system mode (Heat/Cool) matches your HVAC setup. Clean the thermostat periodically to avoid dust buildup. Replace batteries as needed to prevent interruptions. Check for firmware updates through the Honeywell Home app. By following these steps‚ you can maximize energy efficiency‚ comfort‚ and system reliability. Refer to the user manual for additional maintenance tips.
Additional Resources
For comprehensive support‚ refer to the official Honeywell Pro 4000 user manual. Visit Honeywell’s website for detailed guides‚ troubleshooting resources‚ and customer support contact information.
9.1 Accessing the User Manual
To access the Honeywell Pro 4000 user manual‚ visit the official Honeywell website. Download the PDF manual for detailed installation‚ programming‚ and troubleshooting guides. It covers features‚ energy-saving tips‚ and warranty information. The manual is essential for understanding advanced settings and resolving common issues. For further assistance‚ contact Honeywell support directly through their website or customer service hotline. Ensure you have the model number ready for quick reference.
9.2 Contacting Honeywell Support
For assistance with the Honeywell Pro 4000‚ visit Honeywell’s official website and navigate to the support section. You can contact their customer service via phone‚ email‚ or live chat. Ensure you have your model number and specific issue details ready for efficient help. Honeywell also offers a 5-year warranty on the thermostat. If you encounter difficulties‚ check the user manual or FAQs before reaching out. Their support team is available to address installation‚ programming‚ or connectivity concerns‚ ensuring optimal performance of your device.
Leave a Reply
You must be logged in to post a comment.